Digitizing Entire Collections: Chapter 2, Technical Overview
Digitizing Entire Collections: Chapter 2, Technical Overview AikensBPage Contents
Technical Equipment
Technical Workflow
AAA has built a digital content management database that serves as the underlying infrastructure for our large scale digitization initiatives, most often referred to as the DCD (Digital Collections Database). The DCD holds much more than the tables for collections digitization. AAA’s DCD contains collection records downloaded from our MARC catalog records in SIRIS; all EAD finding aids; and all digital content and metadata records generated for researcher requests, outside publications, AAA’s Journal and exhibitions; and AV reformatting. The DCD also contains a comprehensive collections-wide processing survey table; the accessioning table; and an automated removal notices workflow. It is capable of producing numerous reports on digitization and other archival activities.
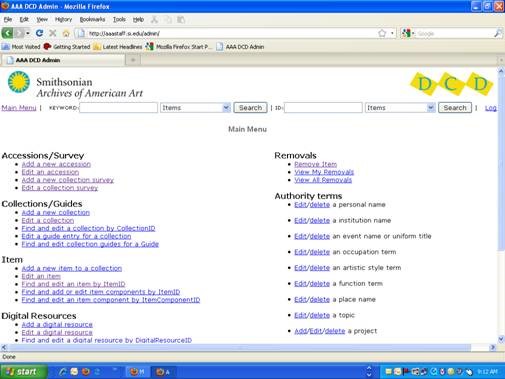
An MS SQL Server database stores all of the data tables and is driven by Adobe ColdFusion programming, with some Java programming. The programming is focused on functions and workflows, such as EAD ingestion, PDF creation, generation of a file directory, creation of multiple sized image derivatives, watermarking, and collection deployment to the web.
Equipment
In 2010, AAA purchased two Digital Transitions RG3040 reprographic camera systems. At that time, AAA began scanning entire collections in color at 600 ppi as the default. Some oversized materials must be scanned at 300 ppi color, or scanned at 600 ppi color and stitched together post processing.
This equipment does not capture a TIFF file. Rather, an .EIP file is created that contains both the RAW camera data file combined with the technical metadata in XML format. Technical metadata is automatically embedded into the file with the equipment’s built-in software and will provide the following information:
File name
File format
Dimensions
Date of capture
Camera serial number and firmware
White balance
Make & model of camera
Capture Software
Shutter speed
ISO speed rating
Files are saved according to file directories that match the container listing in the finding aid.

Workflow
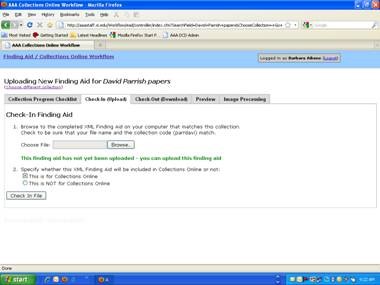
The EAD finding aid created by the processing archivist serves as the only descriptive metadata for the digital files associated with each fully digitized collection. As shown in the diagram above, the archivist uploads her/his EAD finding aid XML file into the DCD via the Collections Online workflow web form found on AAA’s intranet page. All of AAA’s collections are represented in the DCD with a collection-level description ingested from a nightly upload of MARC records from the library catalog (SIRIS), so that the archivist simply selects the correct collection from a drop down menu. Once the finding aid is uploaded, the archivist will select whether the finding aid is for a digitized collection or not. Remember, all of AAA’s finding aids are stored in the DCD.
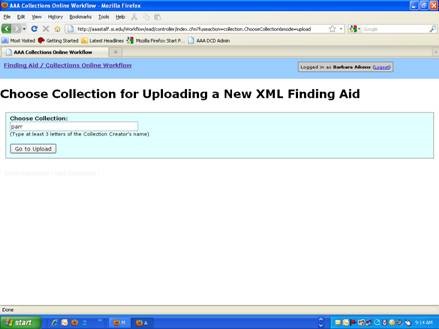
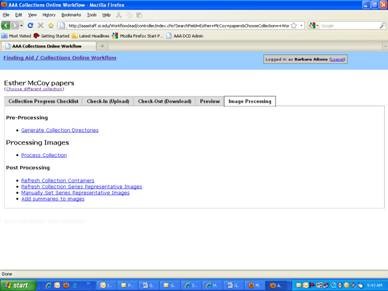
Once a finding aid is uploaded for a collection that will be fully digitized, a file directory is automatically generated from the container listing extracted from the finding aid and loaded onto the scanning technician’s personal computer. Because the file directory is derived from the finding aid, it mirrors both the intellectual and actual physical arrangement of the collection. The scanning technician simply scans each folder in each box and saves the resulting digital files in the directory folder that matches the numbers on the actual folder in the box, which were added by the archivist during processing. File naming is driven by simplified by the alpha-based collection code assigned to each collection combined with a sequential, numerical value assigned by the capture software, for example, jacqselig00001.eip. At this time, the box number is not attached to the file name.
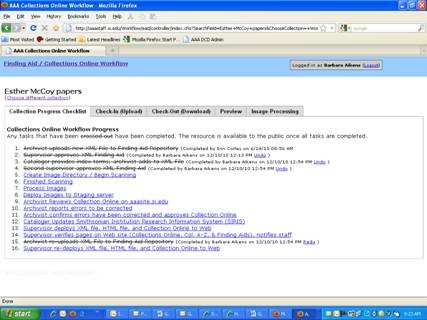
As outlined in the figure above, steps #1-4 are archival processing workflows appropriate for all archival finding aids. The archivist uploads a new finding aid, the supervisor/chief of collections processing reviews and approves the finding aid, the cataloger provides the index terms, the archivist adds the index terms to the finding aid, and the second supervisor approves the final draft (the second supervisor is usually the same as the first).
Steps #5-8 are completed by the digital assets manager. The image directory is created and the collection is ready to be scanned. The scanning technician completes the scanning and the images are processed and deployed to the staging server by the digital assets manager.
Steps #9-11 are completed by the processing archivist after being notified by the digital assets manager. The archivist reviews the site, reports errors, and confirms errors have been corrected. She then notifies the cataloger that the collection is ready for final cataloging and notifies the chief of collections processing (supervisor) that the collection is ready to be deployed to the public website. (See Section V for detailed instruction on the review process.)
Step #12 is completed by the cataloger but checked off the list by the processing archivist prior to notifying the supervisor that the collection is ready to be deployed to the public website.
Steps #13-14 are completed by the chief of collections processing 1-2 days after the final cataloging is complete, allowing some time for the updated catalog record in SIRIS to import into the DCD and display on the public site.
When Step #13 is checked off the list, the htm file is automatically deployed to AAA’s public website. At the same time, the PDF file and the XML file are deployed to the appropriate folders in the Smithsonian’s TeamSite deployment interface. From there, the files must be manually deployed to AAA’s website. The PDF will be visible on the same web page as the htm file, but the XML master file remains in a folder on the server to be harvested by OCLC/RLG for its Archive Grid website/database. Steps #15-16 simply allow the file to be edited, re-uploaded, and redeployed.
Steps #15-16 support subsequent changes to the EAD finding aid and its redeployment.
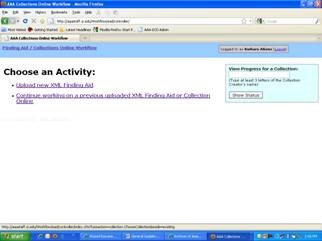
To check out an XML EAD finding aid from the DCD for editing, choose the second bullet in the figure above. Then select the collection and click on the Work with Collection button. The drop down list for this workflow contains only XML documents previously uploaded.

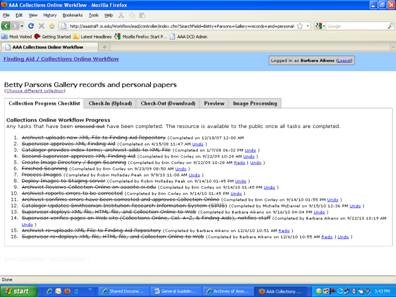
From this screen, check on the Check-Out (Download) tab to check out the XML file. While you have the file “checked out”, no one else has access to it. Click on Preview if you only want to download a copy but leave the master XML in the DCD. If you check on the Check Out tab, a Pop Up Box will appear and you want to save the file, so simply click on OK.
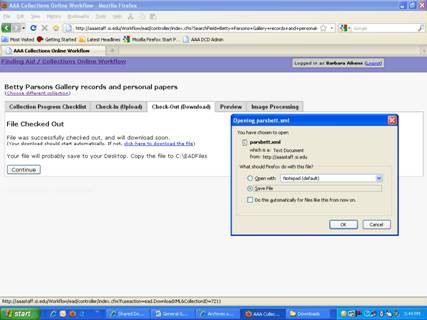
There is a default setting for where the file is downloaded. Usually, it downloads to the My Documents folder on your PC desktop, in the Downloads folder. However, it can vary from PC to PC and might download on your desktop. From there, CUT the file and paste it in your C/eadcb/eadfiles folder for editing in NoteTab.
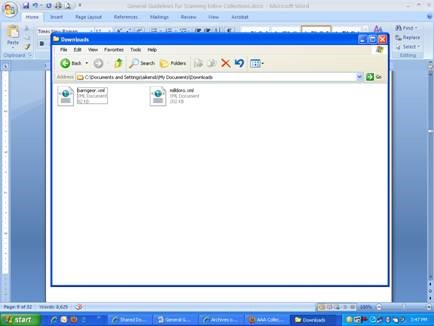
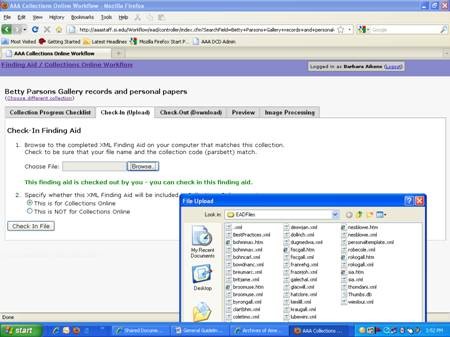
When you have finished, go back to the Workflow and Check-In (Upload) the file. Use the Browse tab to locate the file directory on your PC where the file is currently stored. Click on the correct file name and then click on the Check In (Upload) button. A special screen will pop up to show you the progress of the upload–larger more detailed files can take some time to upload.